

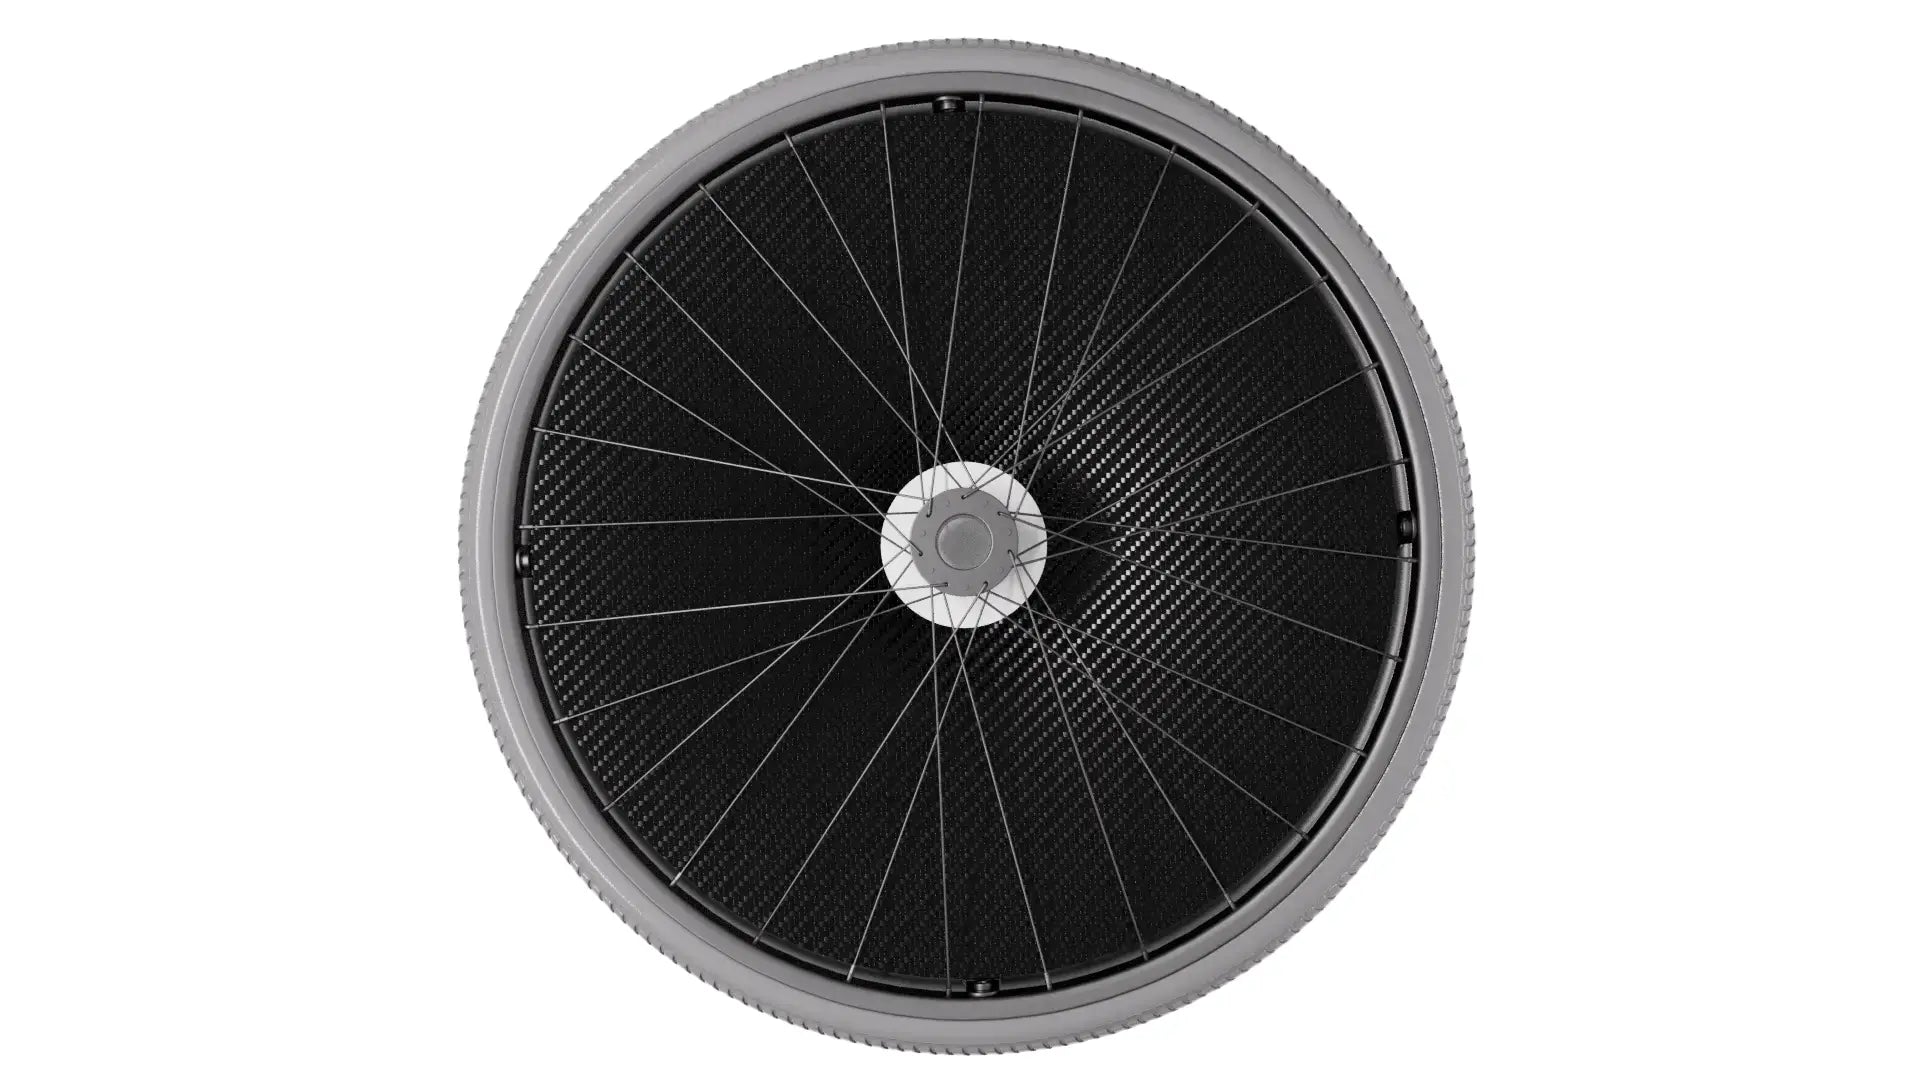
Before You Start: Fit and Positioning
In most cases, installing a spoke guards is straightforward. However, depending on the construction of your wheel, passing it under the handrim may require a little more effort.
The instructions below will help you confirm that the spoke guard size is correct and show you how to guide it safely under the handrim.
Tip: Not All Wheelchair Wheels of the Same Size Are Identical - Wheel size does not describe every part of the wheel.
For example, two 24-inch wheelchair wheels may have different numbers of spokes, spoke thicknesses, spoke lacing pattern, handrim diameters, handrim mounting points, hub sizes and overall constructions.
Because of these differences, a spoke guards may slide easily under the handrim on one 24-inch wheel, while requiring more flexing and effort on another wheel of the same size.
In very rare cases, a spoke guards selected for the correct wheel size may still not sit properly because of the specific wheel construction. If this happens, contact us. We will remake the spoke guards for you at no additional cost, so you can still enjoy the design you selected.
Not Sure Whether Your Spoke Guard Fits?
If the spoke guard passes under the handrim and rests correctly on the spokes, you can continue directly to the installation instructions below.
However, if you selected the spoke guard for your wheel size but cannot get it under the handrim, you may wonder whether the size is correct.
The quickest way to check is to remove the wheel, if it has a quick-release axle, and place the spoke guard against the back of the wheel — the side without the handrim.
Look through the wheel and check whether there is still a small gap between the outer edge of the spoke guard and the handrim mounting points on the opposite side. If there is a gap, the spoke guard size is correct.
If your wheel does not have a quick-release axle and cannot be easily removed, you will need to measure it manually. Detailed measuring instructions are available on the BSP Spoke Guards Size Chart page.
If the measurements confirm that the size is correct, you do not need a different size. You simply need to gently flex the spoke guard and guide it under the handrim using the method shown below.
Tip: Once the spoke guard is positioned under the handrim, gently slide it from side to side across the spokes. A small amount of movement is completely normal at this stage. Once the spoke guard is secured using the selected mounting system, it will sit firmly in place and the movement will stop.
Important: Do Not Remove the Handrim
You do not need to remove the handrim to install a spoke guards.
If you are still unable to position the spoke guard after following the complete instructions and are considering removing the handrim, do not proceed. Removing the handrim may be unnecessary and could cause installation or alignment problems.
This is usually a sign that the spoke guard size may not be suitable for your specific wheel. Please contact us before removing the handrim so we can check the fit and help you find the correct solution.
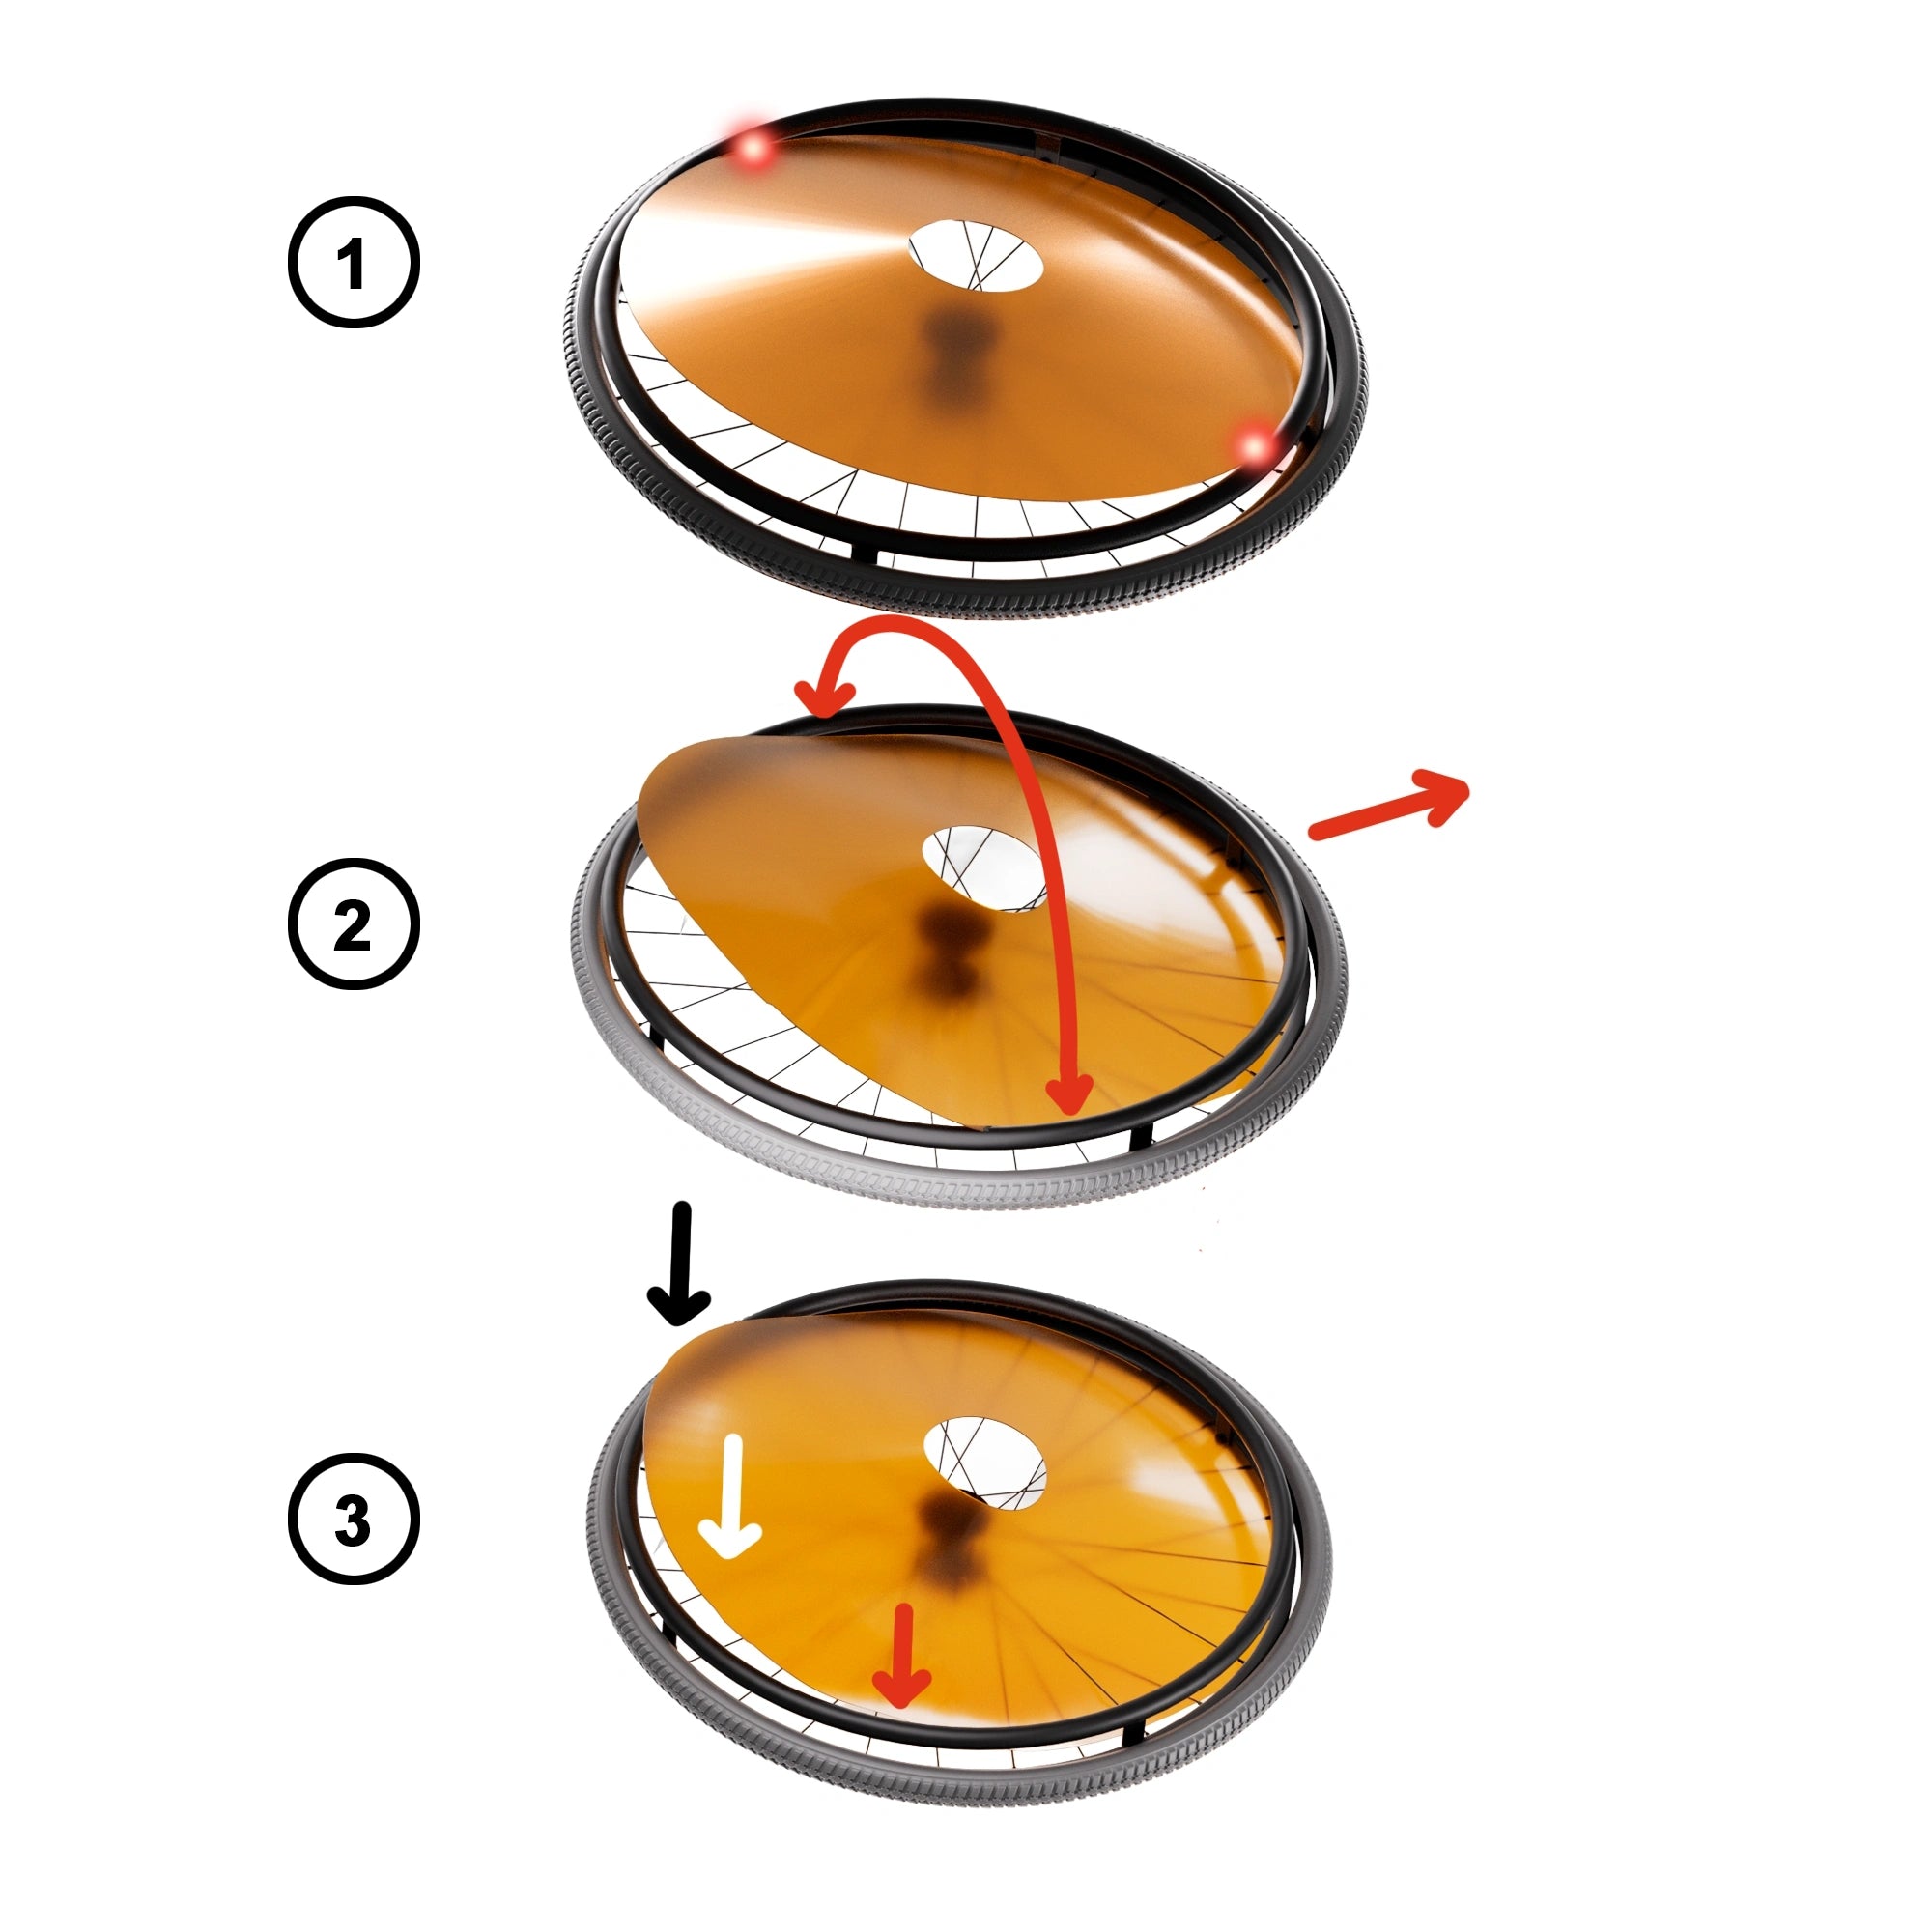
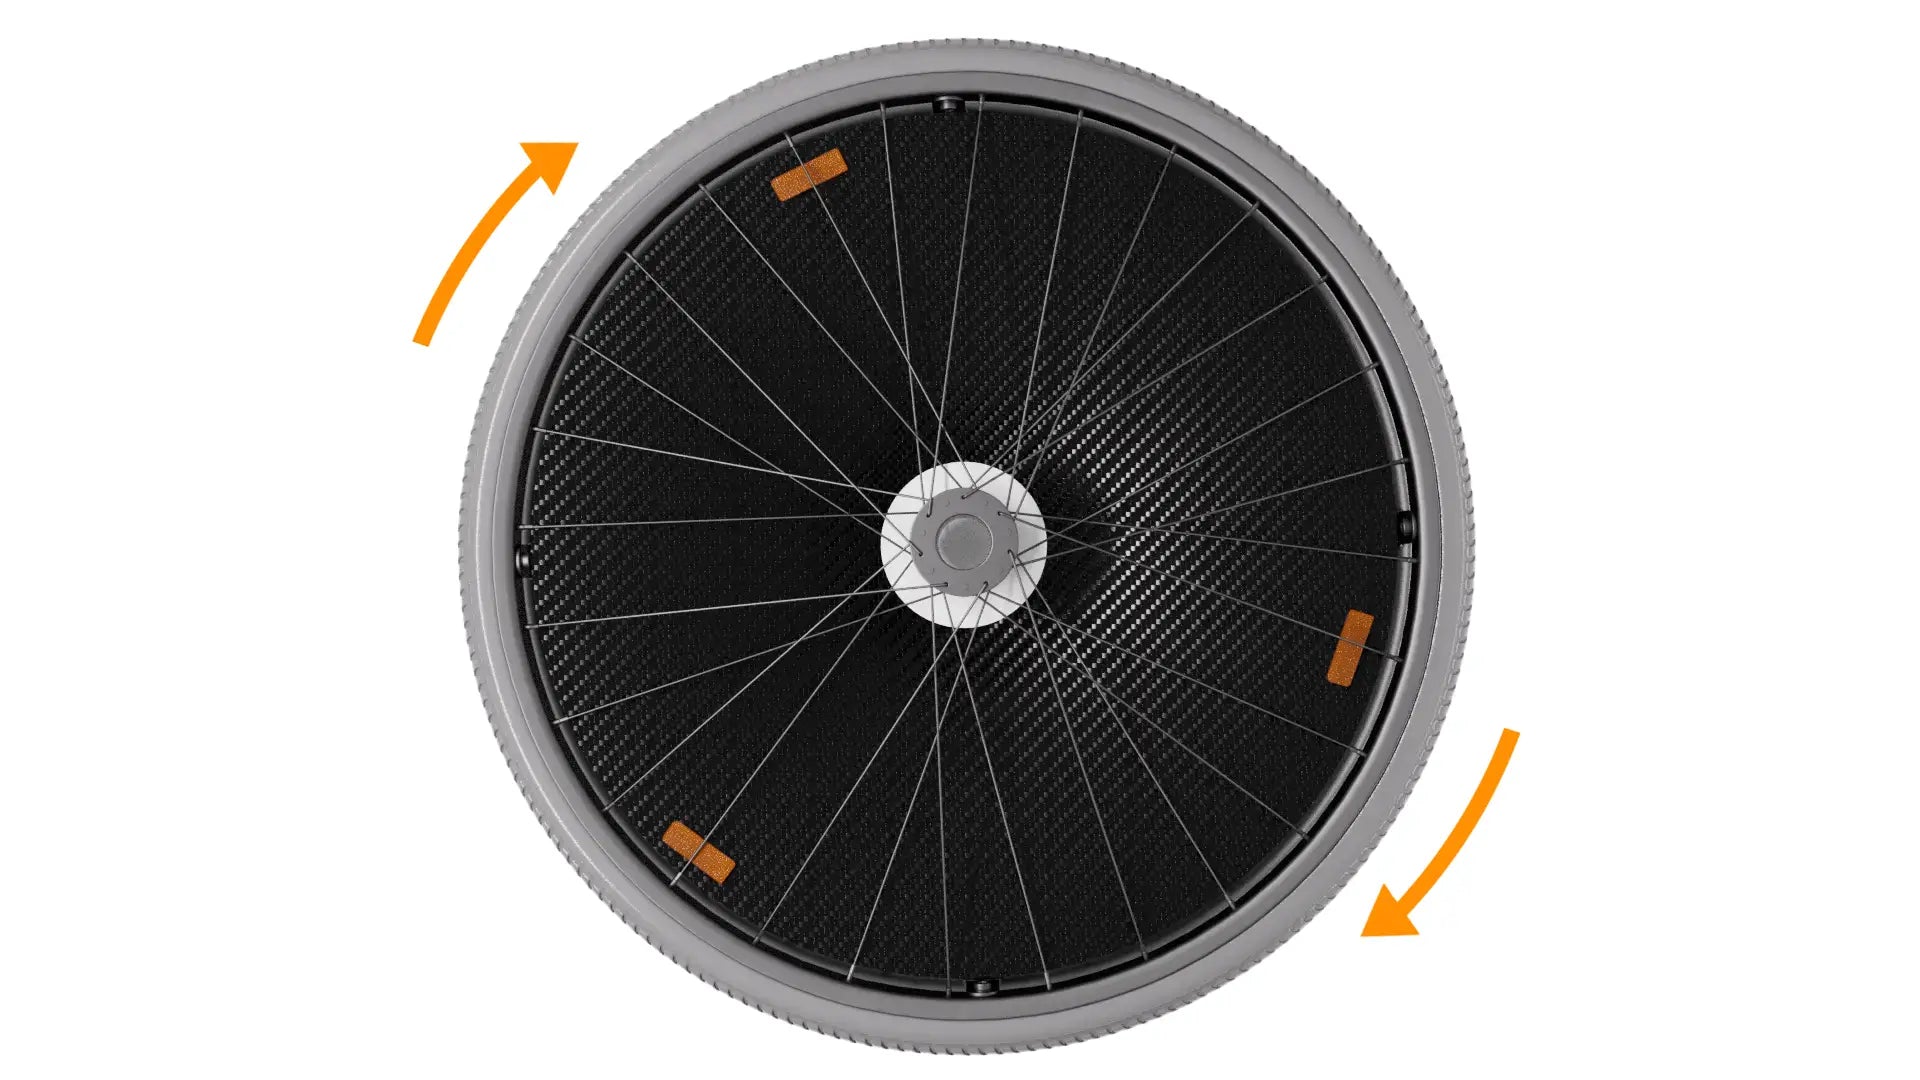
How to Slide the Spoke Guard Under the Handrim
If the spoke guard does not slide freely under the handrim and stops against it, follow these steps:
Step 1 — Insert the Spoke Guard
Insert one edge of the spoke guard between the wheel and the handrim. Push it in until the two opposite outer edges come into contact with the handrim.
Step 2 — Flex and Narrow the Spoke Guard
Hold the spoke guard near the two points where it touches the handrim. Gently press these points towards each other so that the centre of the spoke guard forms an outward-facing arch, away from the spokes. This temporarily reduces its width. Keep the spoke guard flexed and guide the narrowed section under the handrim.
Step 3 — Guide the Remaining Edge Under the Handrim
Once the narrowed section has passed under the handrim, hold the spoke guard by the centre cutout and begin guiding the remaining outer edge underneath. Start from one side of the section that is already under the handrim and continue gradually around the wheel until the entire spoke guard is positioned correctly.
Tips for Sliding the Spoke Guard Under the Handrim
Tip 1: Do Not Be Afraid to Flex the Spoke Guard
Use firm, controlled pressure and bend the spoke guard only as much as necessary to guide it under the handrim. The material is designed to flex during installation.
Do not use tools, apply sudden force or create a sharp fold in the spoke guard.
Tip 2: Wheels with Rubber Handrim Covers
Rubber handrim covers create significantly more friction against the spoke guard, which can make it harder to slide underneath and may cause scuffing.
If possible, temporarily remove the rubber cover before installing the spoke guard.
If the cover cannot be removed, place a thin, smooth material between the handrim cover and the spoke guard where the two surfaces rub. A strip of baking paper (parchment paper) works particularly well because its smooth surface helps the spoke guard slide more easily.
Fold baking paper over the outer edge of the spoke guard at the point where it touches the handrim cover. The paper should sit between the spoke guard and the handrim, allowing the spoke guard to slide underneath with less friction and helping to protect both surfaces from scratches and scuffing.
Tip 3: Ask for Assistance if Needed
If you have limited hand strength, reduced grip or find it difficult to flex and guide the spoke guard under the handrim, do not hesitate to ask someone for assistance.
A friend, family member, caregiver or wheelchair technician can assist you with the installation or install the spoke guards for you. Do not force the installation or continue if the process feels unsafe or uncomfortable.
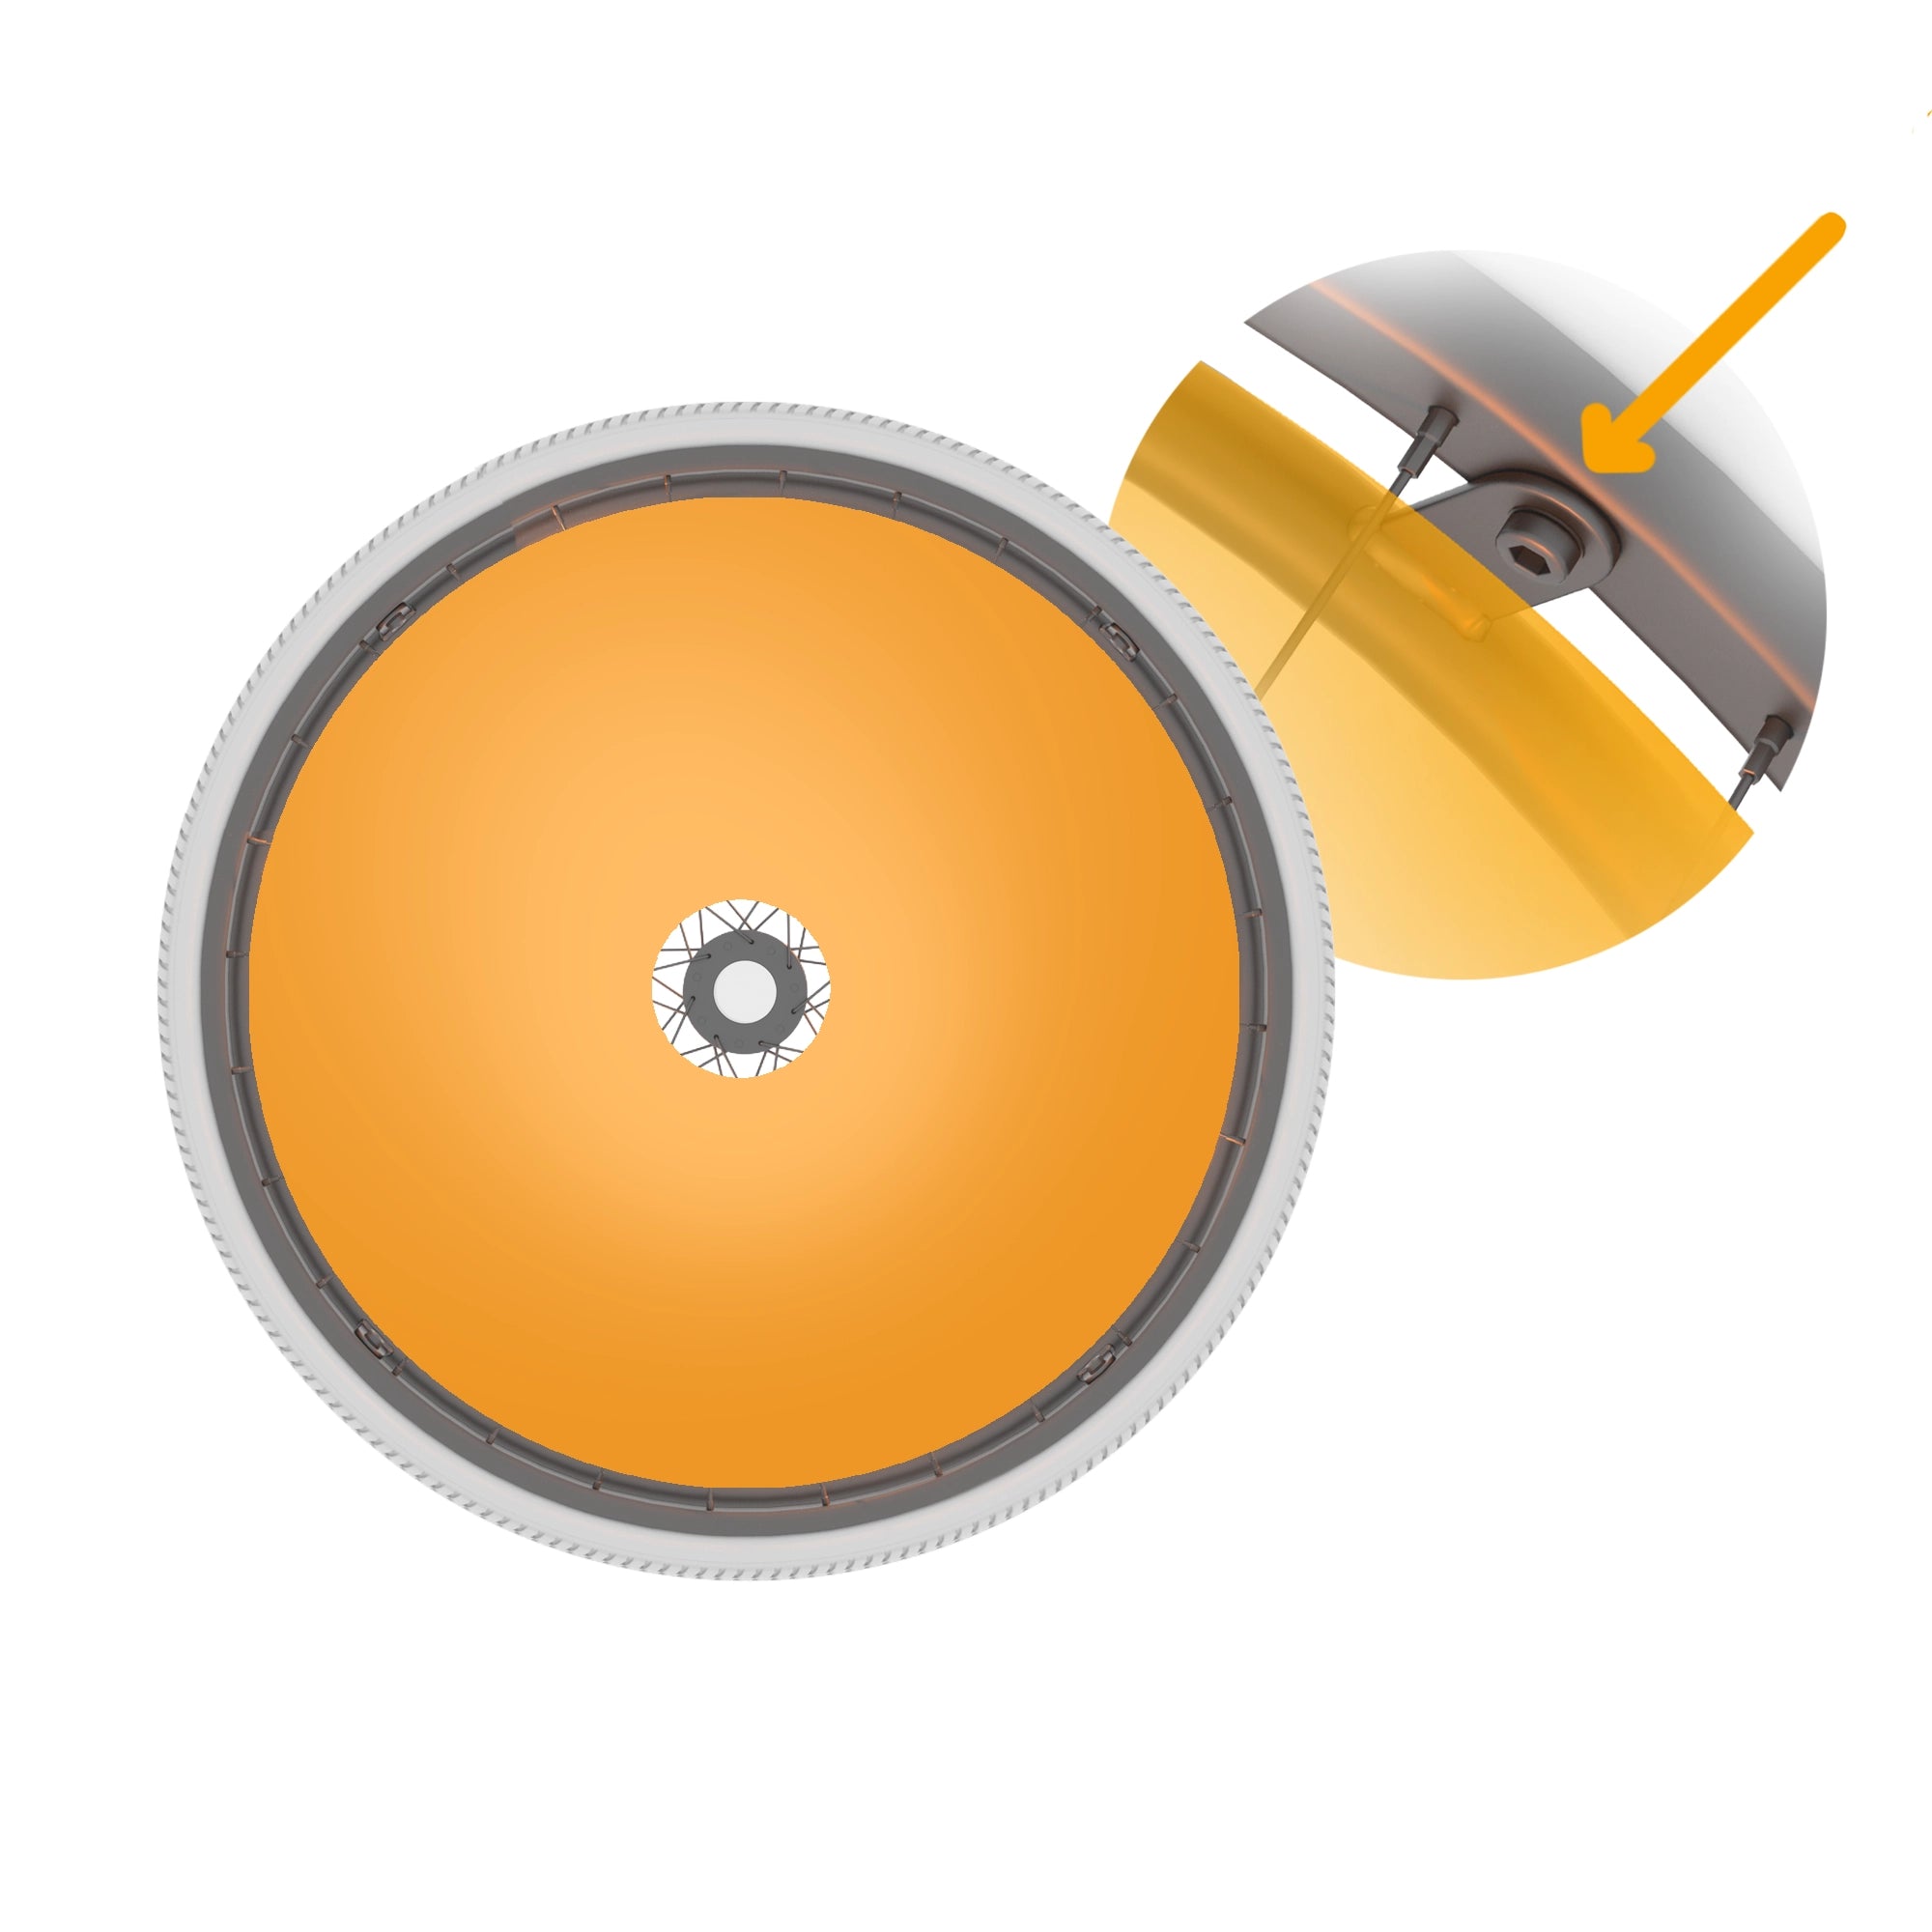
BSP-Lock
BSP has introduced an innovative mounting system called BSP-Lock, compatible with all standard spoke types up to 4 mm thick. Unlike traditional glossy spoke guards that rely on additional holes for zip ties, this system keeps the surface completely intact — preserving both the printed design and the smooth, uniform finish. BSP-Lock is available for matte and carbon variants, offering a sleek, refined appearance for those who value clean aesthetics.
How it Works
The BSP-Lock system is built using aerospace-grade materials engineered for precision and endurance. Our goal was to create a secure fixation method that holds the spoke guard firmly in place — without drilling extra holes, as required by traditional zip-tie or pin-based mounts.
Each BSP-Lock connector consists of two interlocking components made from advanced polymers used in the aerospace industry, known for their exceptional vibration resistance and tensile strength. Once connected, they form a tight mechanical bond capable of withstanding continuous load cycles without loosening.
The base layer features an industrial-grade adhesive film with extreme surface grip, ensuring a long-lasting hold even under stress, humidity, and temperature changes. This material retains full performance up to 90 °C and maintains reliable adhesion across various environments. When locked, each pair generates a tensile separation force of around 35–55 N/cm², providing remarkable stability without any need for visible fasteners.
The upper cap carries the signature BSP emblem, combining clean aesthetics with high engineering precision — a fixation system designed to perform flawlessly and look refined.
How to Install Spoke Guards With BSP-Lock
READ ALL SIX STEPS BEFORE INSTALLATION
Before you begin, take both parts of the BSP-Lock in your hands and try opening and closing it to get a feel for how much pressure is needed to fully lock it.
Align the fastener cover with the base with a slight offset, not perfectly parallel
Don’t hesitate to apply firm force — start closing the lock from one side to help both parts slide together more easily.
To install the BSP-Lock system, first mark the spots where the spoke guard makes the most solid contact with the spokes on your wheelchair.
If your wheelchair has a quick-release axle or you can easily remove the wheel, installation will be easier.
If removing the wheel is difficult, start by marking a single contact point — the lower section of the wheel is usually the easiest place, as the seat won’t get in the way.
First Step - Remove the Wheel
Slide the guard under the handrim and rest it on the spokes. Place the spoke guard on a flat surface with the back side facing up.
Position the wheel on top of the spoke guard, aligning it with the center and spoke pattern for accurate placement.
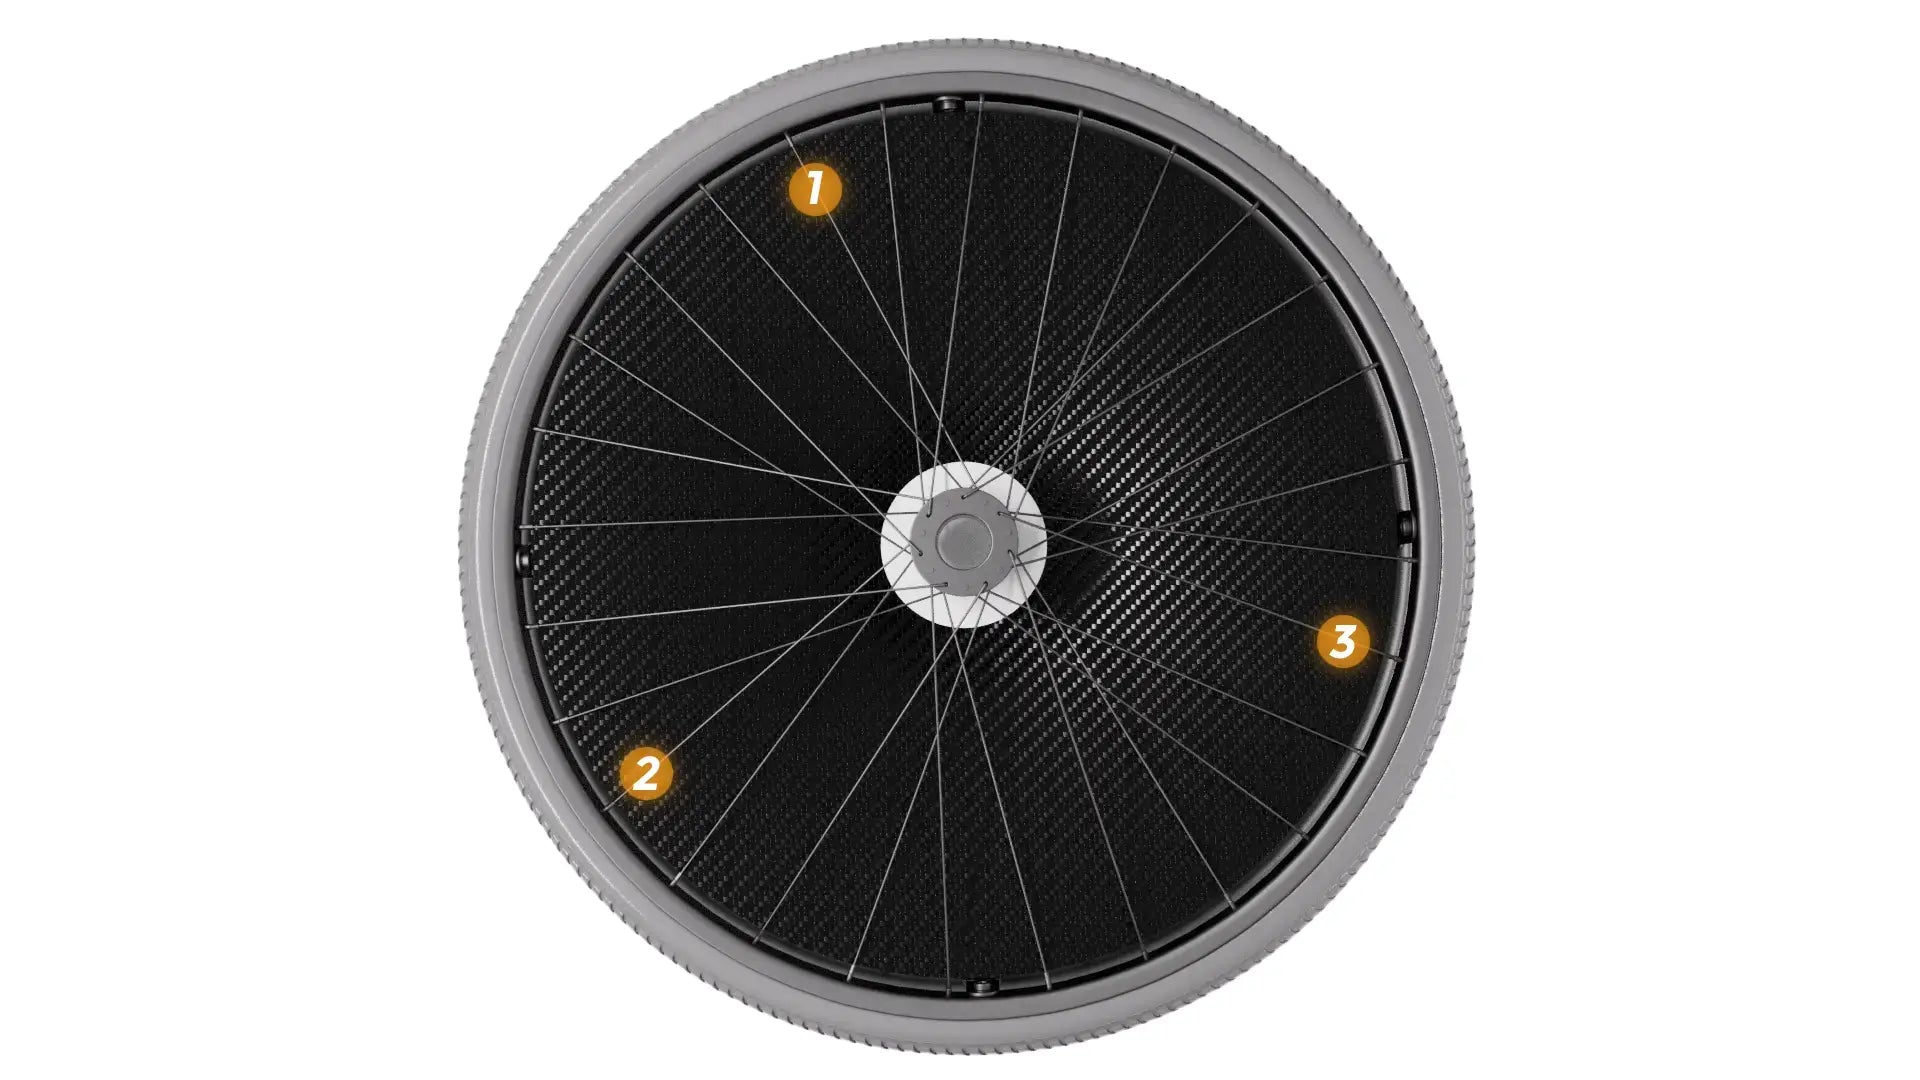
Second Step - Choose Mounting Points
The standard set includes 3 BSP-Lock units for one wheel.
Select 3 mounting points on your wheel so that they form an equilateral triangle — this ensures even load distribution and secure fixation.
If your set includes more BSP-Lock units, choose the corresponding number of mounting points, keeping them evenly spaced around the wheel.
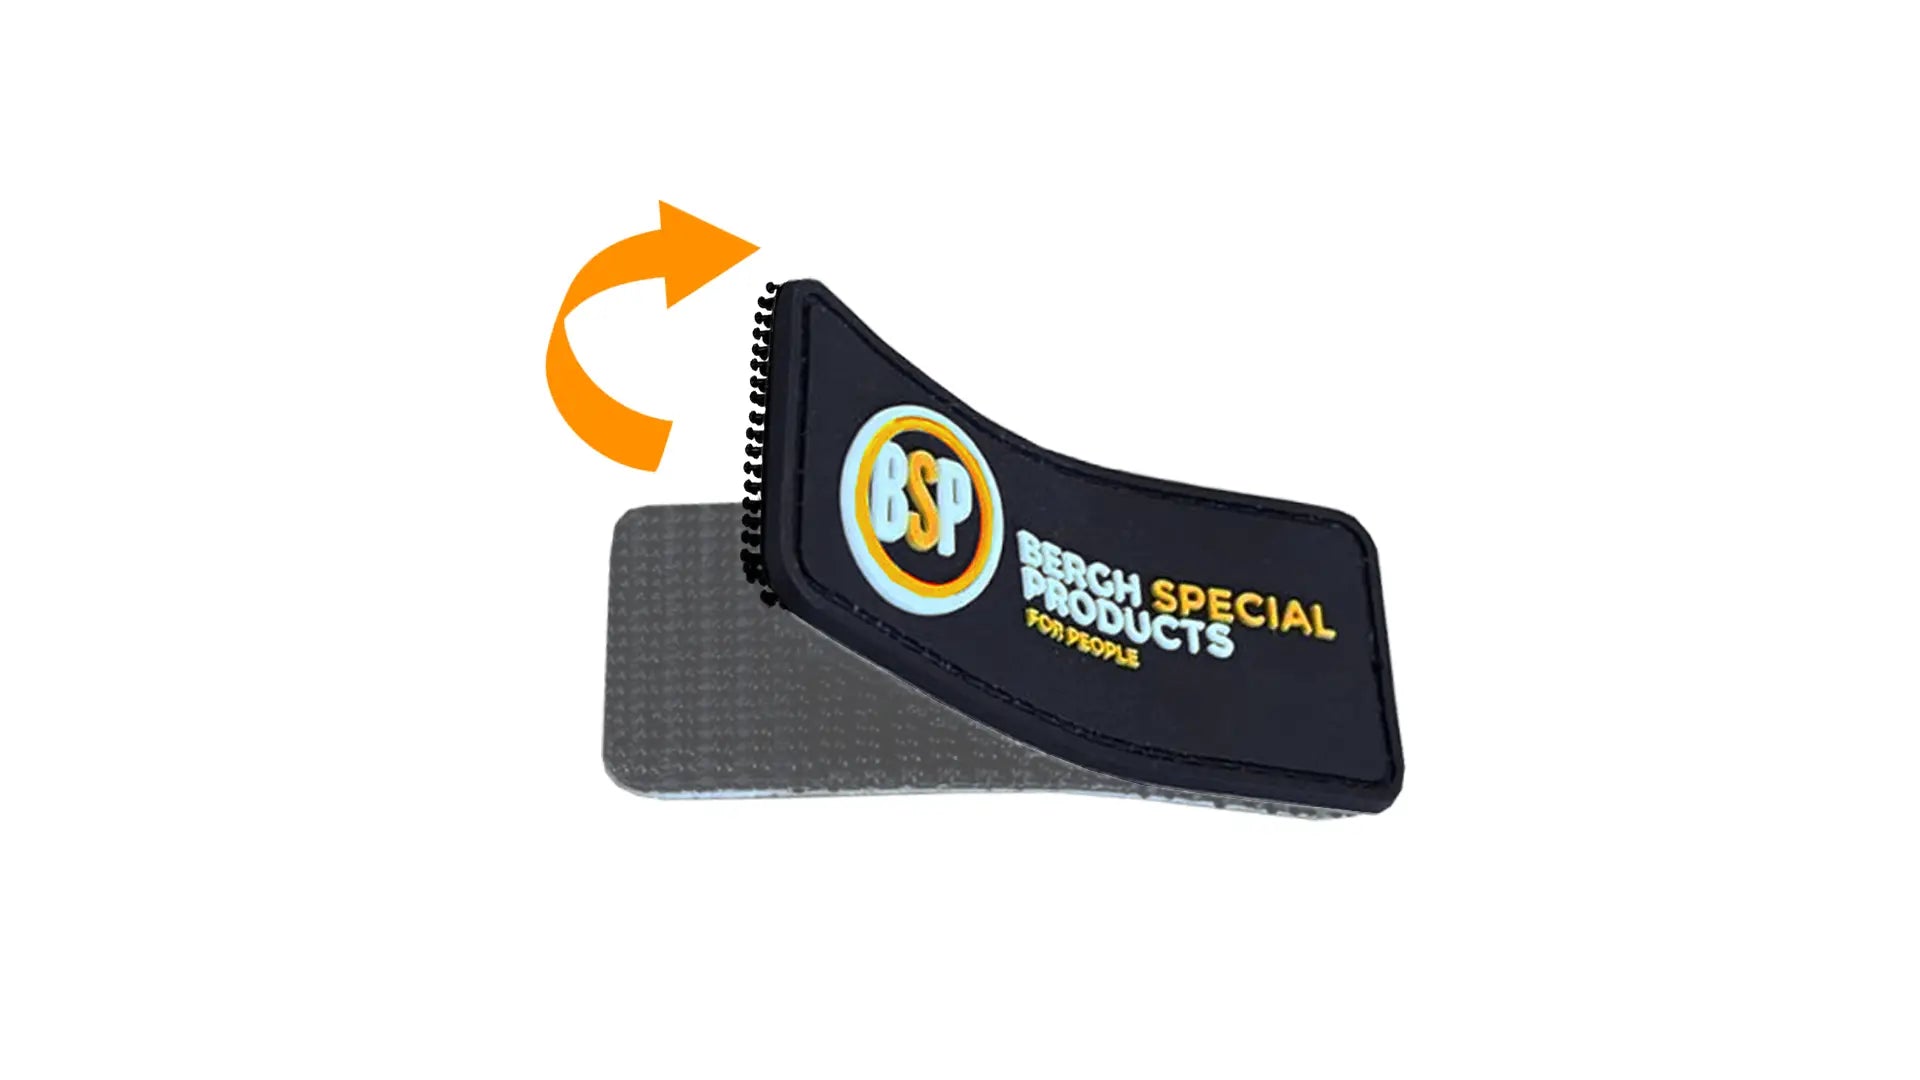
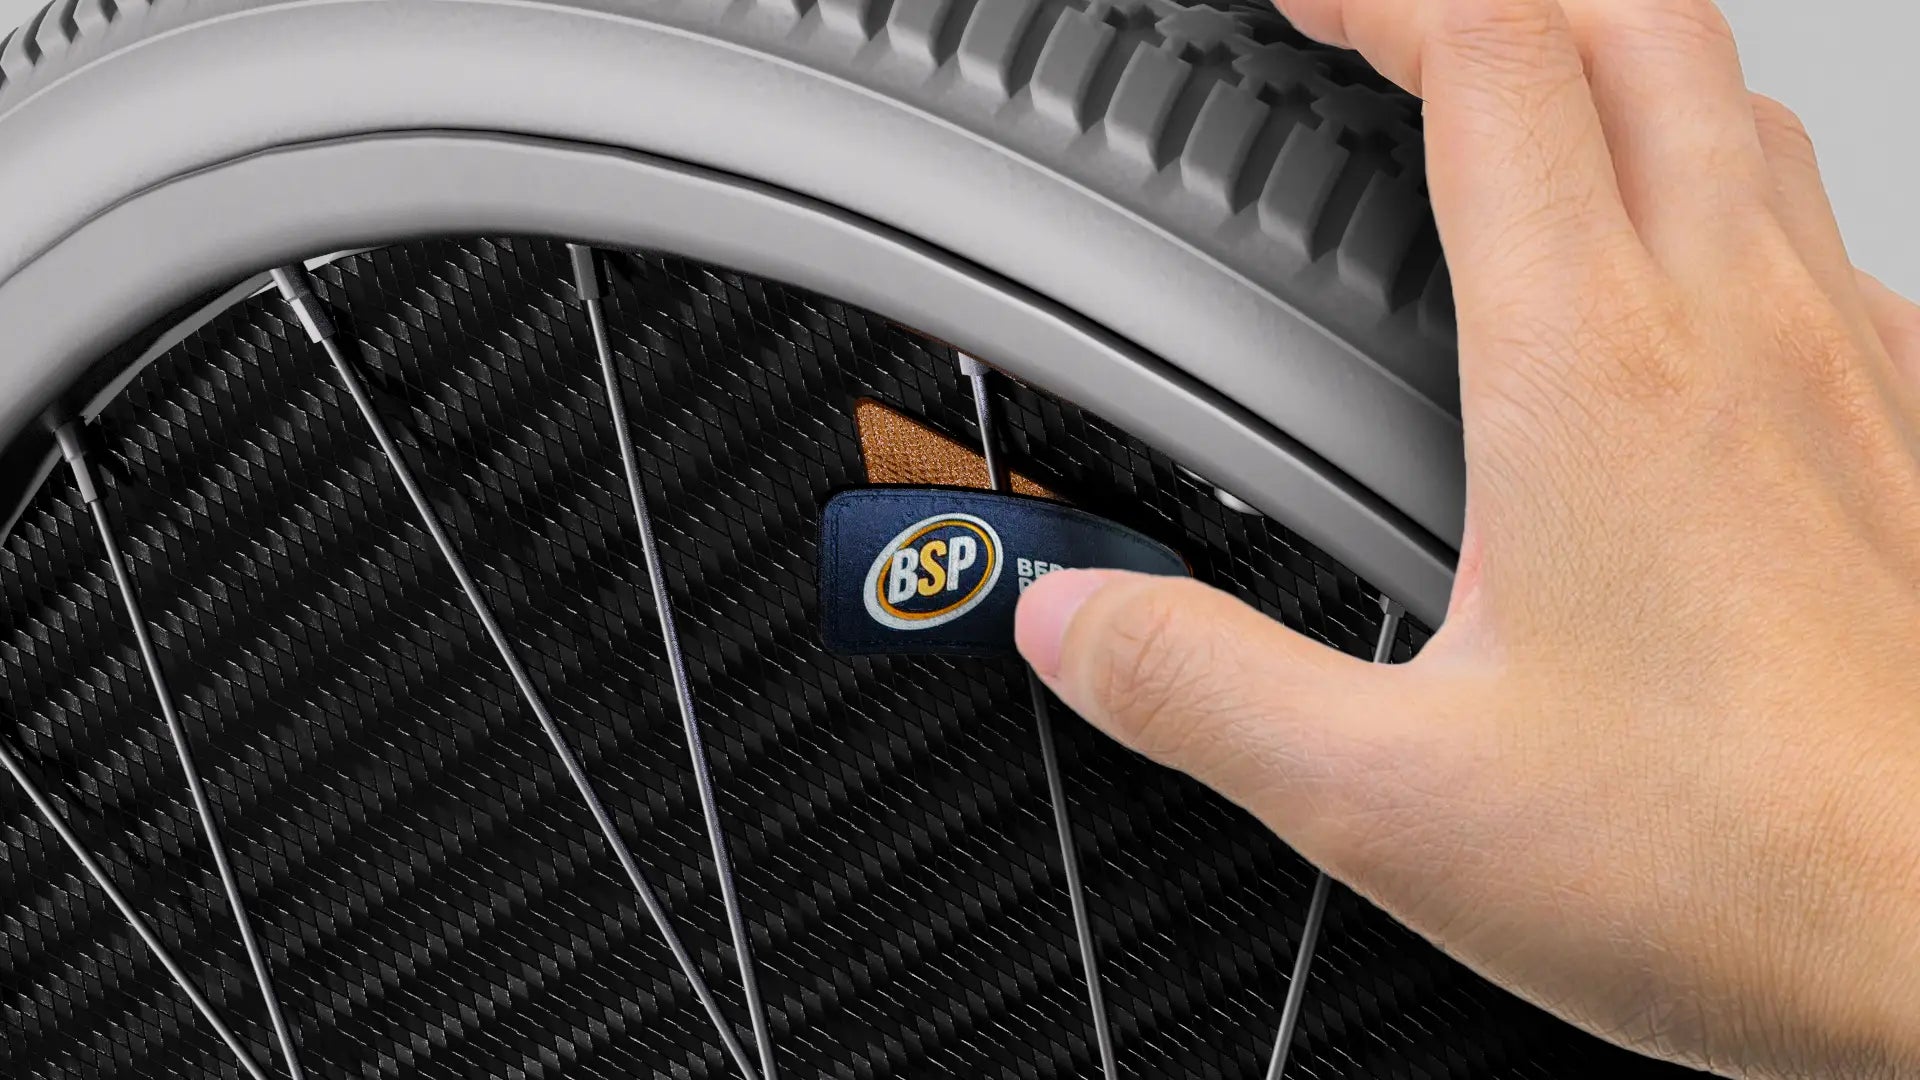
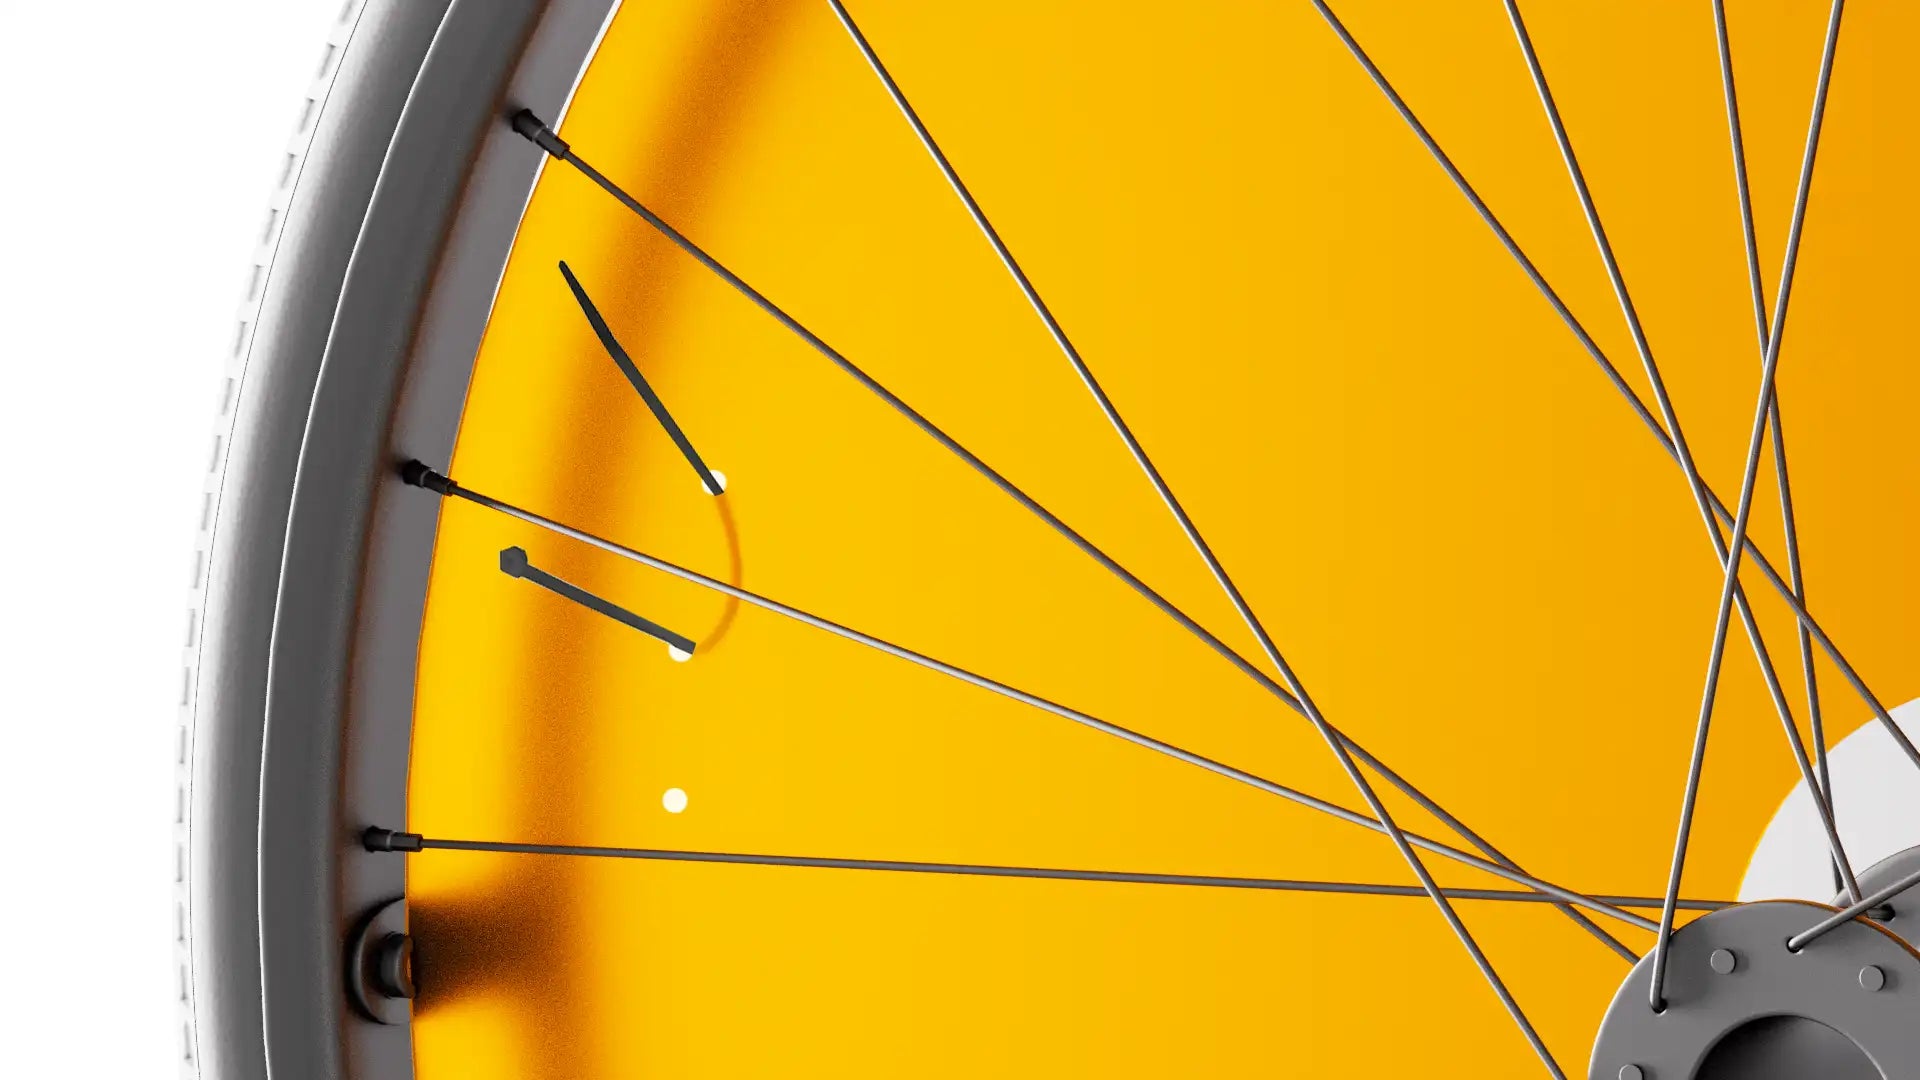
Third Step - Separate BSP-Lock
Take the BSP fastener and separate it into two parts:
- Fastener base — the self-adhesive bottom part (without logo)
- Fastener cover — the top part with the BSP logo
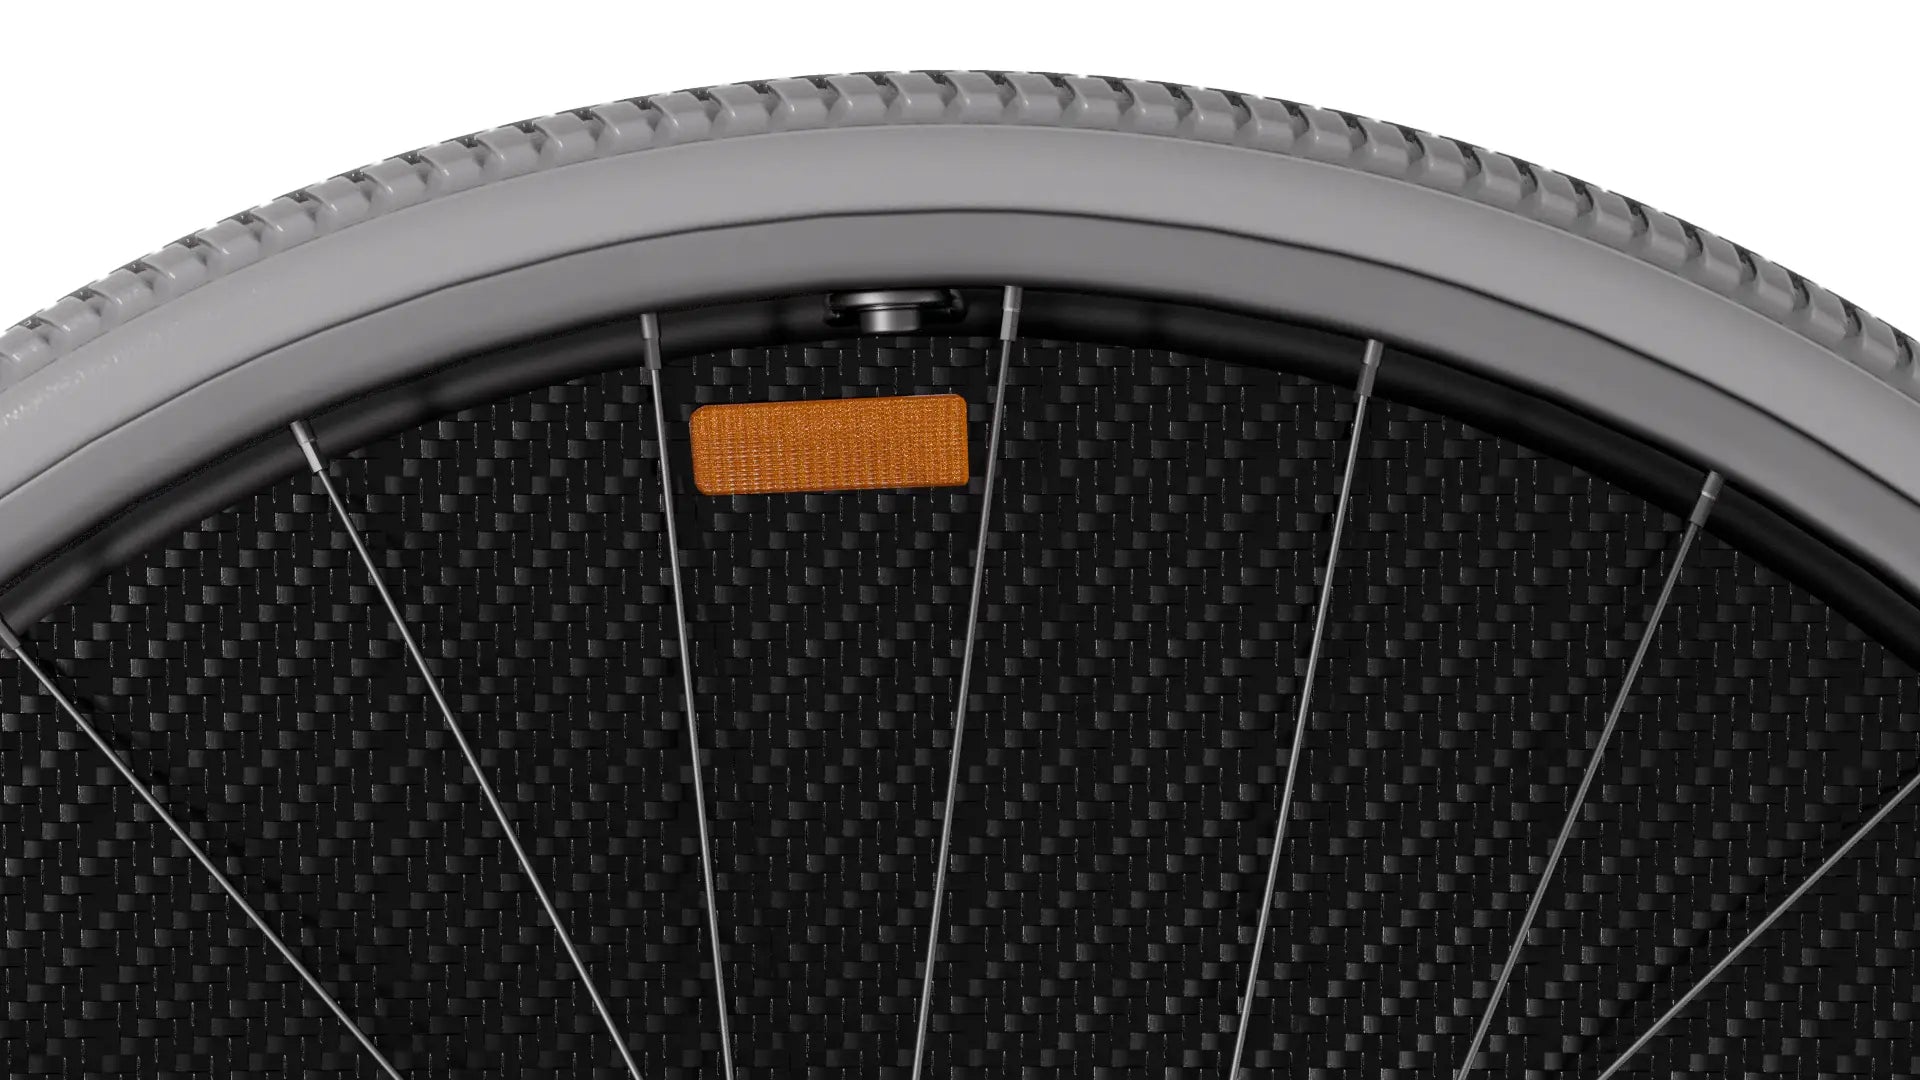
Fourth Step — Attach the BSP-Lock Base to the Selected Points
Remove the protective film from the fastener base and stick the fastener base to the selected points — slightly to the right of each chosen spoke.
NOTE: Press the fastener base firmly only after making sure it’s positioned correctly. Once the adhesive contacts the surface, it bonds strongly and may be difficult to reposition.
Fifth Step - Rotate the Wheel
Rotate the wheel clockwise until each selected spoke rests directly over its corresponding fastener base.
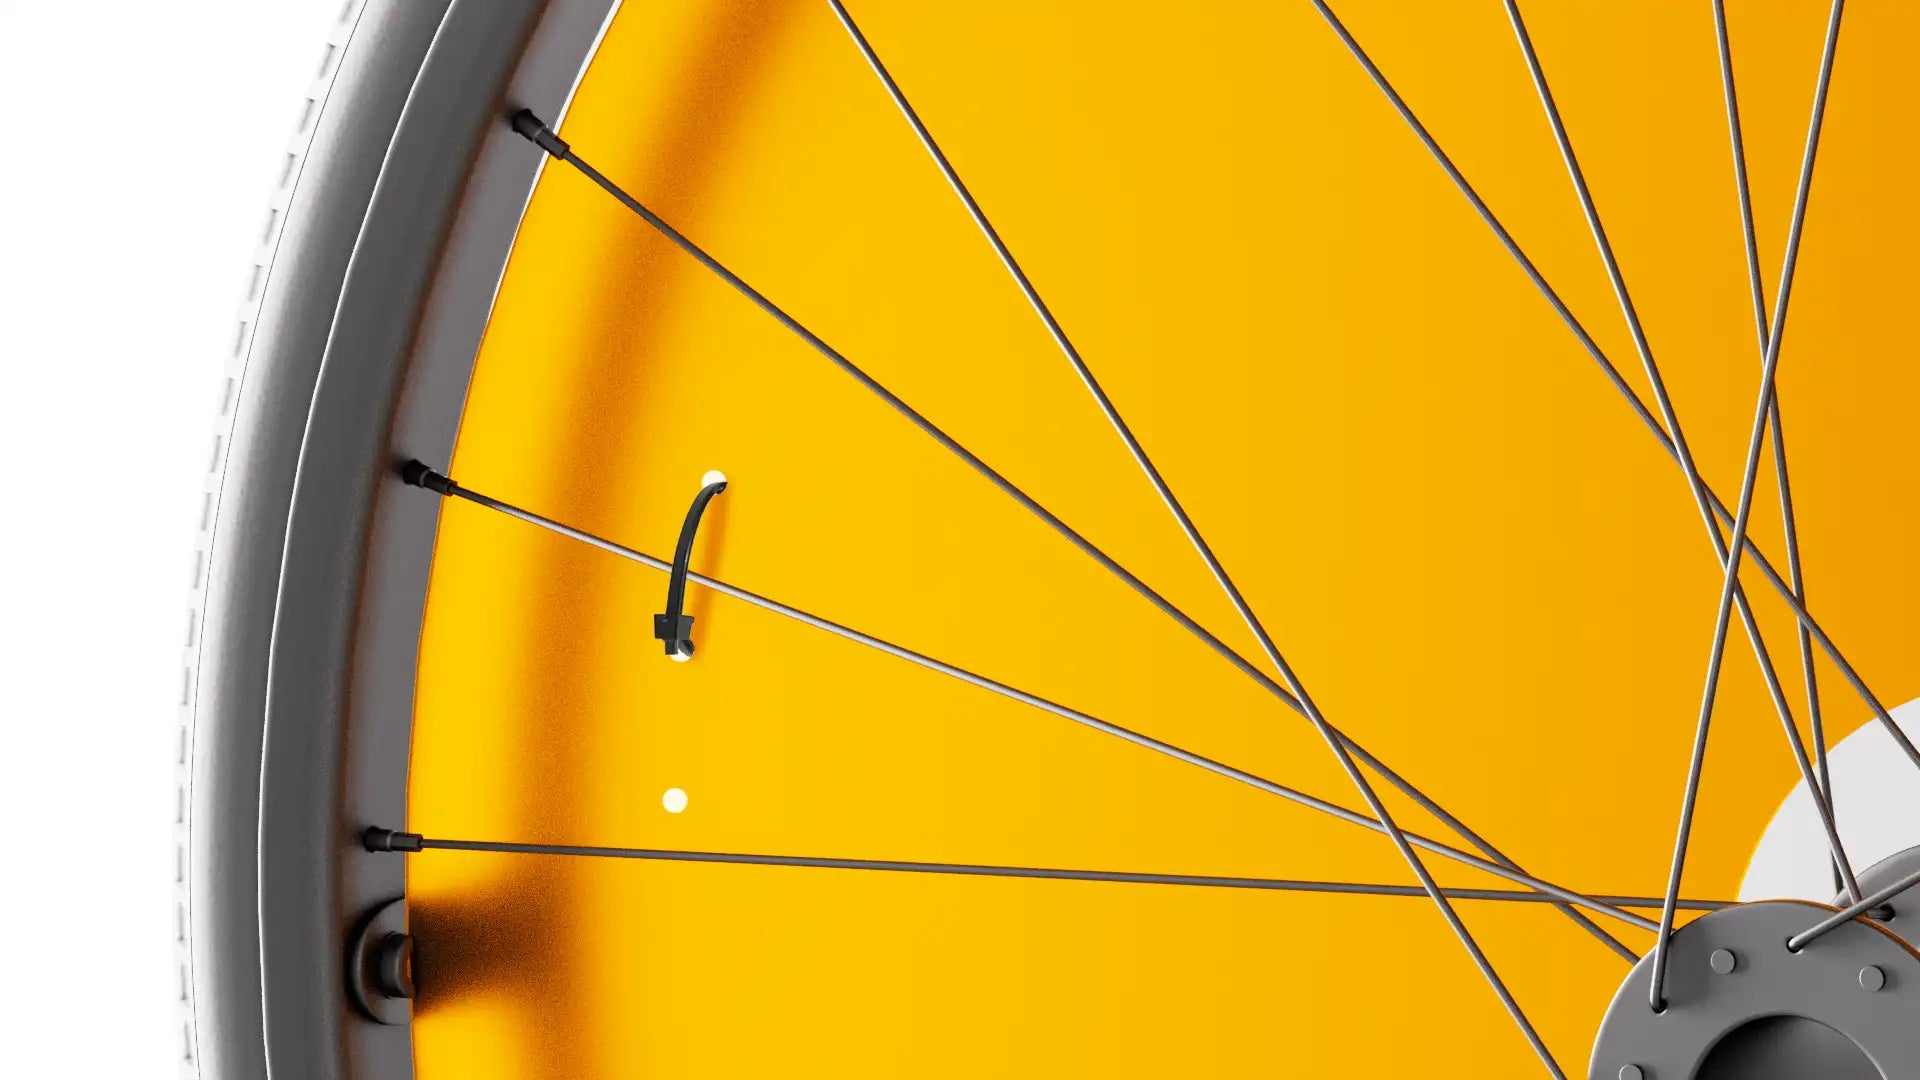
Sixth Step - Lock BSP-Lock
Align the upper part of the BSP-Lock with the base with a slight offset, not perfectly parallel.
This small misalignment allows the teeth of the opposite parts to slide into the empty spaces instead of pressing directly against each other.
Place the cover over the spoke and start pressing from one side of the BSP-Lock, then press from the opposite side. Continue applying targeted, point-by-point pressure until both BSP-Lock parts are fully and tightly connected.
Make sure each selected spoke is securely clamped between the base and the cover. Hold the spoke guard with one hand on the front side near the BSP-Lock during installation.
Don’t hesitate to apply firm pressure — a tighter connection ensures stronger and more reliable fixation.
NOTE: The lock may feel tight — this is intentional for a secure hold and only needs to be done once.
Zip-Ties
The classic and time-tested method of attaching spoke guards. While not the most aesthetic option, it remains the simplest and most reliable way to secure the guard to the wheel.
Zip-tie fixation requires small holes in the spoke guard, allowing the ties to loop around the spokes for a tight and stable hold. This system is easy to install, requires no special tools, and ensures a dependable fit — making it a practical choice for everyday use.
How to Install Spoke Guards With Zip-Ties
On spoke guards designed for zip-tie fixation, you’ll find pre-drilled holes arranged in a 3 / 3 / 2 pattern. This layout ensures compatibility with 99% of common spoke configurations.
If you have a custom version with a different pre-drilled hole layout, the installation principle remains the same — position the guard so that each group of holes aligns with the spokes, and secure it using the supplied zip ties as described below.
First Step - Align Mounting Holes
Slide the guard under the handrim and rest it on the spokes.
Start guiding the spoke guard under the handrim. If the guard does not pass through easily while flat, do not be afraid to bend it slightly by hand. This will temporarily make the wider part narrower, allowing you to slide the spoke guard under the handrim more easily.
Position the guard so that each hole group lines up with a spoke — the spoke must pass between at least two holes in every group.
Second Step — Loop the Zip-Ties
Starting from the inside of the wheel, insert the zip tie through the first hole of the spoke guard. Then loop it around and feed it back through the second hole of the same group, so that both ends of the zip tie point inward toward the wheel spoke.
Third Step - Lock the Zip-Tie
Tighten the zip tie around the spoke until the spoke guard sits firmly in place. You can either leave the zip tie ends as they are or trim them neatly with scissors for a cleaner finish.
Pins
Also known as button fixation, this method offers a cleaner and more elegant look compared to zip-ties. It requires small pre-drilled holes in the spoke guard, allowing the pins to lock securely through the spokes while keeping the surface visually neat and refined.
However, pin fixation is only suitable for wheels with spokes up to 2 mm in diameter. When compatible, it’s the best choice for transparent spoke guards, as it maintains a discreet appearance and keeps the design clearly visible.

How to Install Spoke Guards With Pins
On spoke guards designed for pin fixation, you’ll find pre-drilled holes compatible with the most common wheel configurations featuring 18, 24, or 36 spokes.
If your spoke guard has a custom hole layout, the installation principle remains the same — align each hole with the wheel’s spokes and insert the pins to ensure a secure and accurate fit.
First Step — Align Mounting Holes
Slide the guard under the handrim and rest it on the spokes.
Start guiding the spoke guard under the handrim. If the guard does not pass through easily while flat, do not be afraid to bend it slightly by hand. This will temporarily make the wider part narrower, allowing you to slide the spoke guard under the handrim more easily.
Position the spoke guard so that each pre-drilled hole aligns precisely with a spoke. The spoke should run close to the edge of the hole, allowing the pin to pass through and lock securely once inserted.
Second Step — Lock the Pins
From the outside of the wheel, push each pin through the pre-drilled hole toward the spoke until you hear a distinct click indicating it has locked securely in place.
Frequently Asked Questions About Spoke Guards Installation
What fixation methods are available for BSP spoke guards?
What fixation methods are available for BSP spoke guards?
BSP spoke guards can be installed using three fixation systems: BSP-Lock, zip-ties, or pins. Each method offers a different balance between aesthetics, strength, and installation convenience. BSP-Lock provides the cleanest look without visible fasteners, while zip-ties and pins remain classic, proven solutions.
How is BSP-Lock different from other fixation systems?
How is BSP-Lock different from other fixation systems?
BSP-Lock is a unique BSP development — no other brand offers this type of fixation. It requires no extra holes or visible fasteners, providing a cleaner, stronger, and more durable connection.
Can I use zip-ties or pins instead of BSP-Lock?
Can I use zip-ties or pins instead of BSP-Lock?
Yes. Zip-ties are the most common and easy-to-install option — they require pre-drilled holes on the spoke guard and provide reliable fixation. Pins are less common but also suitable for certain wheel configurations. All systems are interchangeable depending on your preference.
Are all fixation types compatible with all types of spoke guards?
Are all fixation types compatible with all types of spoke guards?
Yes. All fixation types — BSP-Lock, zip-ties, and pins — are compatible with every BSP spoke guard. However, BSP-Lock works best with matte and carbon guards, maintaining a seamless, premium look. For transparent or neon guards, zip-ties or pins are recommended, as they offer a cleaner visual effect without interfering with the guard’s clarity.
Do I need to remove the wheel to install BSP spoke guards properly?
Do I need to remove the wheel to install BSP spoke guards properly?
Removing the wheel is recommended for the most accurate and comfortable installation, especially when using BSP-Lock. However, if that’s not possible, you can still install the spoke guard directly on the wheelchair — simply mark and attach one section at a time.
Discover the Complete BSP Product Range
Browse the complete selection of BSP wheelchair accessories — spoke guards, trays, wheels and rims, mounting systems, hardware, bags, add-ons, and spare parts. Every product is durable, high-quality, and trusted by hospitals, rehabilitation centers, and wheelchair users worldwide.


